Native-Art-in-Canada has affiliate relationships with some businesses and may receive a commission if readers choose to make a purchase.
- Home
- Build a Birchbark Canoe
- Steps to a Birchbark Canoe
Building Birchbark Canoes
Step by Step Guide to Birchbark Canoes
These step by step instructions on how to build birchbark canoes are simplistic but they will give you the general idea of what's involved. If you've actually found the tree, peeled the bark and set up your work space I think you probably have what it takes to figure it all out anyway!
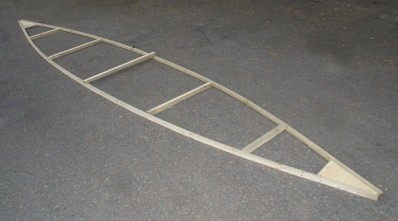 |
Taking into consideration the bark you have available, you'll start by building a frame that will ultimately determine the length and width of your finished canoe. White cedar doesn't readily decay and it's light weight so is a good choice for thwarts and ribs, too. You can use other types of wood but the decay and weight factor are important. |
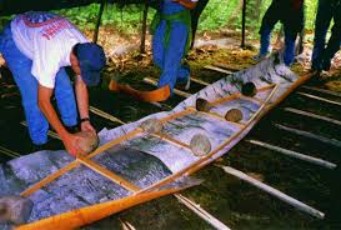 |
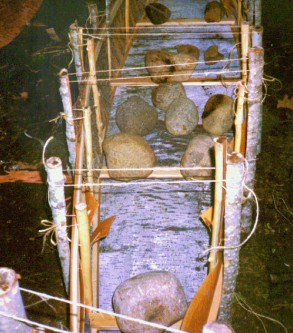
Layout the bark and hold it in place with rocks or cement blocks. It's unlikely that you were able to find a tree with sufficient girth to give you a a roll of bark long enough and wide enough to construct the canoe in one piece. You'll have to spend some time piecing the bark together with split cedar or spruce roots. |
 |
Carefully hold the bark erect and drive stakes into the ground along
both sides of the frame to hold the bark upright. So
that the bark will eventually fit snugly around the template you'll have
to cut several gores in appropriate places before you drive the stakes
into their permanent positions. Pieces of extra bark may have to be sewn in place at this point. |
 |
Step 3 |
 |
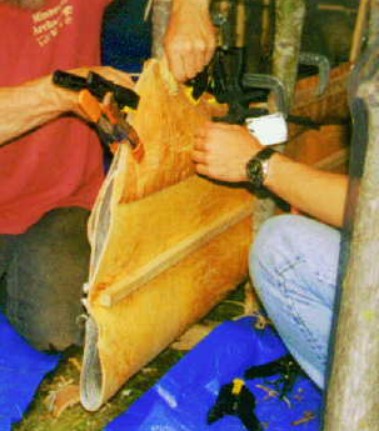
Build the outer gunwales and sandwich the bark between them and the inner gunwales. Hold them in place with clamps. Instead of clamps, experienced canoe makers would permanently lash them together at either end of the canoe. . . but that's not you. |
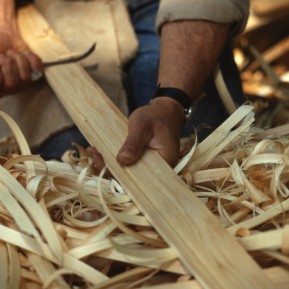 |
Make the thwarts. Split white cedar into boards and rough them into the appropriate shape with a hatchet and do the fine finishing with a crooked knife. Bevel the ends so they'll fit snugly into the mortise you carve into the inner gunwales. All this is done with your keen artistic eye. |
 |
Mortise the thwarts into the gunwales temporarily. They'll have to be removed later to lift the building frame from the bottom of the canoe. Now's the time to drill holes into the ends of the thwarts so that they can be lashed into place later. The number of holes will depend on the width of your thwart. |
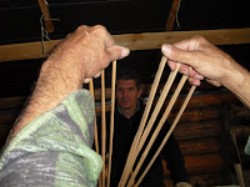 |
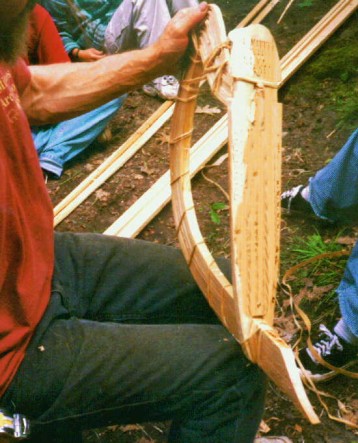
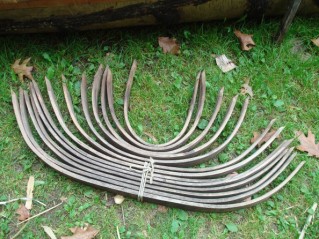
Now you need to make the stems. They're the wooden pieces that fit into the
very back and front of the canoe. Split a 1 1/2" strip of wood from a log of appropriate length. Then split that board in 8 pieces but not
completely. One end remains whole, and the slices are laminated to make it easier to bend.Traditional canoe builders didn't need to laminate. |
 |
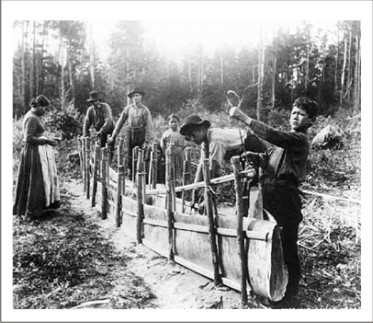
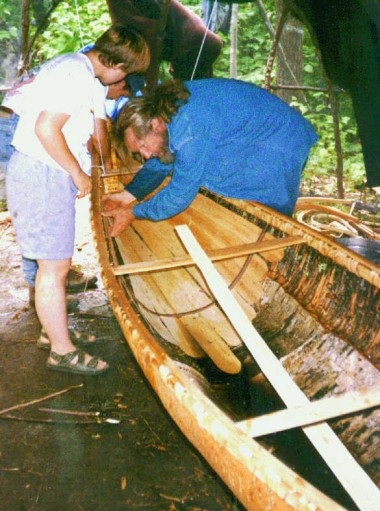
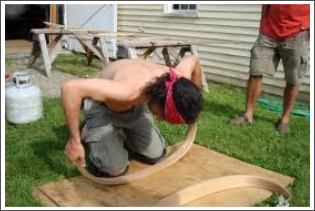
These novice canoe builders are bending the stem around a jig that their instructor conveniently prepared in advance. My relatives used an experienced eye rather than a jig. But whatever method you use, tie the stem in place and allow it to dry. |
 |
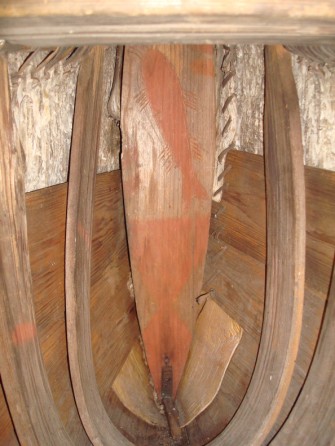 |
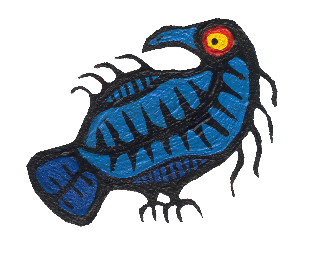
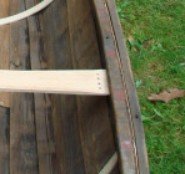
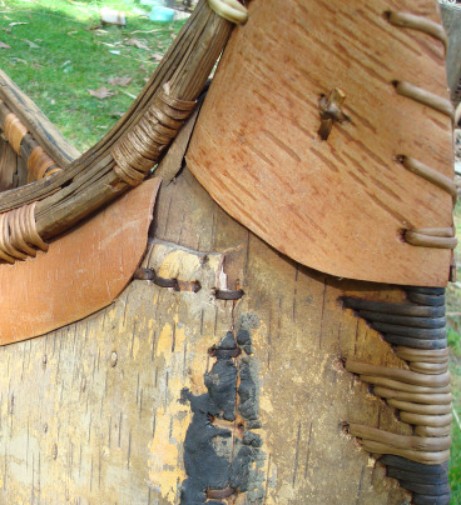
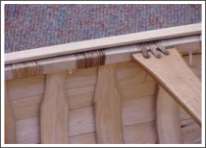
Build the stem pieces and place them at the ends of the canoe. The photo on the right was taken by Ferdy Goode who restores Ojibwa birchbark canoes. The canoe in question may be 100 years old. Notice the extra piece of bark at the bottom that add strength to the contact point. The shape of the stem pieces (sometimes known as manboards) varied from location to location and maker to maker so if you mess up you can always say you planned it that way. The bull head fish design painted in red ochre is the dodem of one of the original clans. |
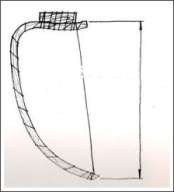 |
You might want to add a little triangular piece to the top of your canoe stem. It's your decision because it depends on the design and shape of your canoe. |
 |
Birchbark canoes were lashed with split roots and if you didn't dig some up while you were harvesting the bark now's a good time to head back into the bush. Black spruce will do the job nicely. Spruce roots are called watap. Ideally you will find a tree that's standing off by itself because the roots won't be entangled with other vegetation. A pair of gloves will come in handy. |
 |
It's better to come home with too many roots than not enough. The roots will probably range in length from three feet to perhaps thirteen or fourteen feet and will have varying diameters. Cut into the thicker end at the half way point of the diameter and split in half by hand. Sandwich the root between a flat surface (like the butt end of an upright log) and your knife blade and pull the root through to scrape off the bark. Then use your knife to clean up left over bits of bark and any rootlets. My kokum made a slender notch at one end of a board about three feet long and pulled the roots through to peel them. |
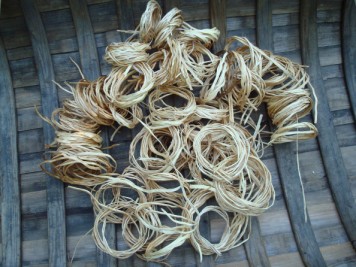 |
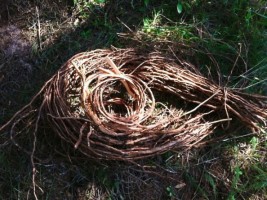
It's a good idea to tie the cleaned up and split roots into individual coils at this point so they don't get tangled up. This way they look neat, can be stored for future projects and your mother will be proud of you. |
 |
Mark exact 2" increments along the gunwales on both sides. Use an awl to punch holes through the bark and with split spruce root, lash the gunwales to the bark leaving two inches between each lashing. If you managed to get hold of birch bark that's a full 1/4" thick you won't have to do this, but otherwise you might want to add a reinforcing strip to the outer edge at this point if your bark is thin and/or somewhat brittle. It gives a nice decorative touch if it's cut in a scalloped pattern. |
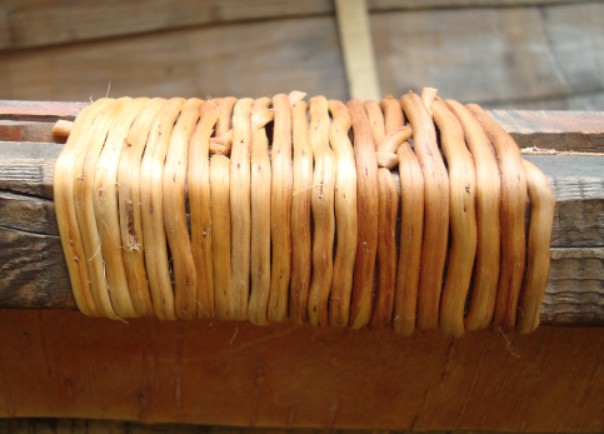 |
Secure the lashing by tucking the ends of the roots under a neighbour. |
 |
Cut the bark to shape (don't over cut) and lash the ends to those fancy stems you made while you're at it. |
 |
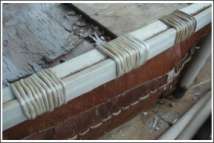
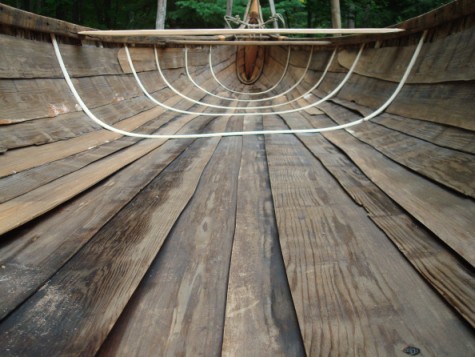
This hundred year old birchbark canoe restored by Ferdy Goode shows examples of two lashing styles. The sawtooth design at the bottom would have been a job reserved for the Ojibwa community's elder builder simply as an honor. You don't have to do anything so elaborate. See the strip of bark under the gunwales? That's there to reinforce the original birch bark. |
 |
Once the gunwales are lashed securely you can take out the frame and then put the thwarts back in to add some temporary stability. At this point all birchbark canoes will wobble and feel spongy so don't fret. It will be solid once the sheathing and ribs are installed. |
 |
To make the sheathing, split a white cedar log into strips that are between 1/8" and 1/4" thick and four or five inches wide. You'll be good at it by the time you're done. Notice that the ends of the sheathing have been rounded to help prevent gouging the bark and are temporarily held in place with narrow strips. |
 |
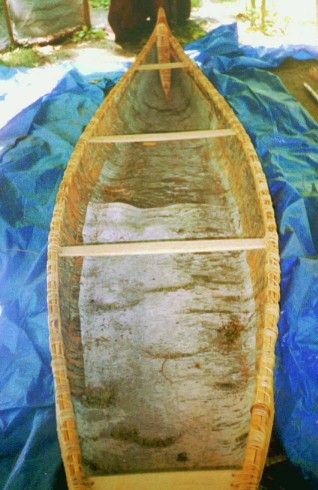
This is the original sheathing re-installed and temporarily held in place with narrow strips of alder in a 100 year old canoe. Notice how the sheathing overlaps. |
 |
Once you've sheathed your canoe it's time to construct the ribs. I just wanted to point out that canoe ribs aren't all the same length . . . same width, yes. . . and you MUST split your own planks from a cedar log, not a sawn plank. The cedar has to follow the grain if it's going to bend properly. Split an appropriate number of 2" wide pieces of cedar into strips that are about 1/4" or 3/8" thick and appropriate lengths for the ribs of your particular canoe. If the plank begins to thin too much while your splitting it, put some force on the thick end and the split should move back into that part of the cedar. Smooth them out with a crooked knife. |
|
The way you bend the ribs is going to determine the shape of your hull and bending ribs is done free hand. Scary, huh? Assuming you've done a little bit of measuring and planning you'll start by laying out the ribs across the gunwales in their appropriate order. Parallel to the gunwales, mark off a distance four fingers wide at each end of each rib. See, I told you it was free hand! (grin) That mark is going to be where the bend will start when you begin shaping. |
 |
Unfortunately for you I'm going to have to scrounge up some rib bending photos and continue with that part of these birchbark canoes instructions later. I can tell you though that in days of yore men bent the ribs without benefit of jigs and they aimed to have a flat bottomed canoe rather than one that was distinctly round. As you bend each rib mark it so that you know it's position when you're ready to install. |
|
The ribs pieces must be soaked in hot water or steamed before you attempt to bend them. When you get each of them to the shape you want, tie them in position and allow to dry. When dry, temporarily position
them between the gunwale lashings and cut to their final size. Remember. Measure twice, cut once. |
 |
Take your time and install the ribs in their permanent positions. When the hundred year old birchbark canoe's ribs were re-installed some had to have birch bark extenders wrapped over the ends to make a tight fit. I'm thinking they'll have to do the same with my teeth in a few years. |
 |
Lash the thwarts into their permanent positions. |
 |
Collect lots of spruce gum in a pail and heat it with some tallow and charcoal over a fire. The gum/fat/charcoal mixture won't melt in the sun or crack in the cold. Spread the mixture over all the seams. |
|
Carve a paddle. |

Build Birchbark Canoes - Preparation
Find the tree, strip the bark, prepare the site.
From Dugout to Birchbark
I grew up at a time when everyone had a canoe...sometimes several. It beat walking.
|
|
 |
 |