Native-Art-in-Canada has affiliate relationships with some businesses and may receive a commission if readers choose to make a purchase.
- Home
- Brain Tanning
Brain Tanning
The Ancient Process of Brain Tanning Hides

Brain tanning hides is a lot of work, but you end up with an exceptionally soft hide that remains pliable even after it gets wet.
If you have a hide or two in your freezer and are looking for step by step instructions on how to brain tan, you've come to the right place. But take note. Brain tanning is labour intensive, sometimes gory, often smelly and generally not for the feint of heart.
Just What is Brain Tanning?
Brain tanning is a rigorous process that at one point involves rubbing an emulsified solution of animal brain tissue and water into a wet rawhide. The emulsion helps break down the membranes that have to be removed before the hide can be used for clothing and footwear.
And with a nod to Mr. Kavanaugh who spent five years of his life drumming Latin into my teenage head, I can tell you that the root of the English word tanning comes from the Latin word tannum. In ancient Rome a tannum was a leather maker. Hence the verb tannare meaning "to make leather".
I bet I'm the only Latin speaking Indian you're ever going to meet!!
And because I'll probably never get another chance, I'll continue to elucidate.
The Romans didn't brain tan. They soaked oak bark in water to make a bitter solution that helped dissolve the membranes on the hides. The word "tannins" has come to refer to those chemicals that give a bitter taste on our tongue Strong tea, coffee, red wine, unripened fruit, for example.
But on with the lesson . . .
The Start of the Brain Tanning Process
At the end of a hunt the priority is to process and preserve the meat. There's usually no time to tan a hide.
Bark Tanning
I've never tanned a hide using bark but it was standard practice in some ancient cultures. Pieces of bark were soaked in water to release the chemicals that can break down mucous membranes and other body tissues.
I've read that bark from birch, alder and hemlock is useable but sumac and oak are supposed to contain more hydrosoluble tannins.
At this point, we used to tie the hides in a bundle and string them high in a
tree safe from most scavengers. Sometimes ravens would pick at bits of flesh, but porcupines thought the pack was a free lunch.
When they were finally removed from storage the skins were often dirty...and always smelly. Nowadays when a hunt's finished the hides might be salted, rolled into a bundle and stored in a freezer until needed.
Step by Step Guide to Brain Tanning
Step 1: So What's the Plan?
At this point, instructions on brain tanning hides often jump into the preparatory steps leading to the final scraping of every hair and bit of flesh still remaining.
But the first step is to decide what you want to do with the tanned hide.
If you intend to be make it into a rug or warm winter coat only one side of the hide needs to be scraped, because the hair doesn't have to be removed. But if the intention is to make moccasins, a jacket or other piece of clothing, all the hair must be removed from the skin.
Some animal hides are better suited for one purpose than another.
- Beaver, martin, mink otter, lynx, muskrat, fox, wolf, bobcat, badger and wolverine are good choices for clothing.
- A bear hide makes a sturdy rug and provides good insulation between you and the snow if you're camping out. Buffalo can be either a rug or a heavy coat.
- Deer and moose make useless rugs, but great footwear, clothing and carry bags.
- Rabbit skins can be tanned but are either ornamental or cut into strips
and knit or woven into a jacket or cape.The exception might be if grandma wants to sew a cute little coat for a new grandchild. The baby will outgrow it long before it begins to deteriorate.
If you want the hair to remain on the hide, of course you don't have to follow through with any of the procedures that removes it. But when you come to the bit about applying the brain slurry you're going to have to be extra careful so that none of it touches the furry part.
For this discussion I'm going to assume that you'll want to know how to take off the hair.
So here we go.
Step 2: Soak the Hide
When the time comes to begin the brain tanning process, take the hides out of the freezer so that they are thawed.
You have to soak the skins in water for a couple of days to clean and soften them and a frozen hide isn't going to fit into many of the containers you may have on hand.
My first choice would be to submerge the hide in a lake because the nibbling minnows will start the fleshing process. Besides that, its easy to sloosh off any dirt and grime when you haul it out of the water.

If a lake isn't available call on your creative side - a barrel, the kids plastic wading pool, even a five gallon pail. But remember that city bred wives tend to fret if they find you've taken over the bathtub.
Make sure your hide is entirely covered by the water and let it soak for a couple of days. This will loosen the membranes and the hair. But don't leave it in the water for more than three days because at some point it's going to rot.
Sorry...I just messed up!
Unfortunately for you and me I just messed up royally! I had my step by step guide already to go and closed this page WITHOUT BUILDING IT so lost all my work!
I'll have to wait until tomorrow to re-do the page so you're left with my notes which follow.
Step 3: Removing the Grain and the Hair
The grain is the name given to that layer of skin where the hair is attached. At the same time as you remove the hair you have to remove the grain . . . every little bit of it.
If you don't do a thorough job of removing the grain, your hide will be stiffer than it should be and won't have an even finish when you smoke it.
Start by taking your hide out of the water and squeezing as much water out of it as you can. If it's a moose hide you'll probably need a second pair of hands.
This isn't the same as wringing the hide, which you're going to do later. You just want to remove the water to make it lighter and to be able to move it around without it dripping quite so much.
Step 4: Fleshing the Hide

Now you're going to have to scour the skin to remove the flesh and fat.
Like graining, there's a couple of ways that this can be done.
My kokum stretched the hide on a frame and used a carved bone flesher. I was young and not paying attention at the time, but I remember that it was a wide, flat bone that had been shaped to fit into a slot in the wooden handle. It was secured with rawhide strip. Perhaps it was a pelvic bone.
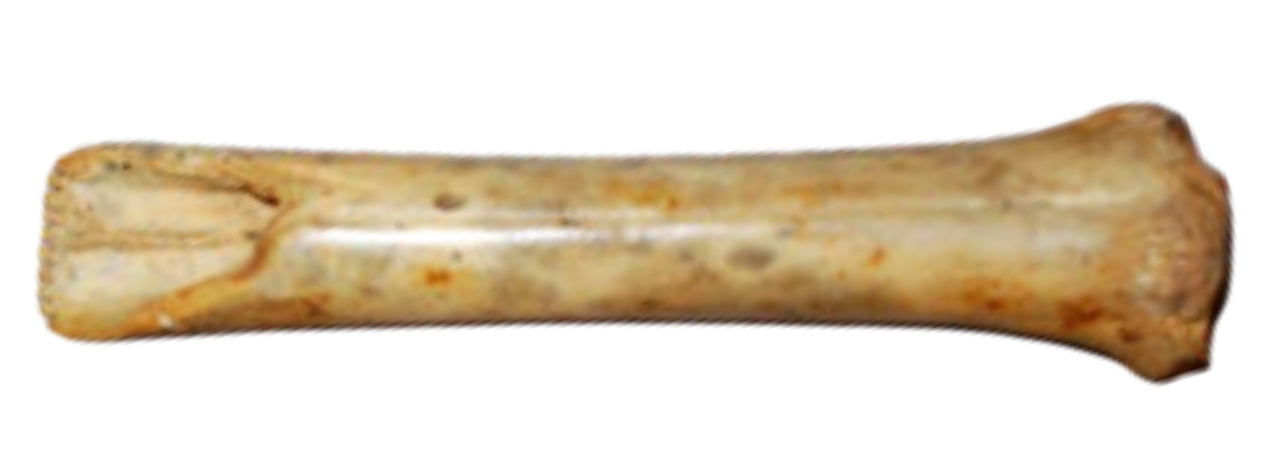
She sometimes used a bone flesher like this:
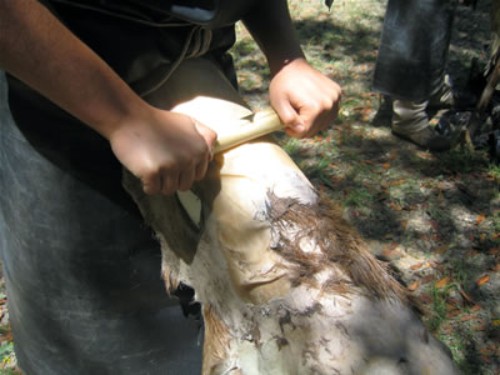
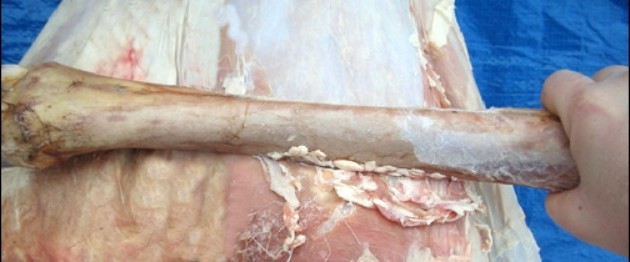
But you can also drape the damp hide over a wide log and use a leg bone to pull the flesh from the hide. If you didn't save a leg bone you might try a piece of pipe or a heavy dowel. A narrow, flat piece of steel would work if it has rounded rather than sharp edges.
The point is you have to push down hard on the flesh and pull towards you to scrape it off.
Methodically flesh every bit of the hide until you're left with a snowy white surface. Rub your hand over the entire surface in search of any missed bits.
When you're sure you've got rid of the grain, spread the hide out in the sun to dry...it won't take too long.
Now it's time to turn your attention to the inside of the hide. You're going to scrape off the membrane layer which is where the blood vessels are. Before you start you have to wet the hide again. Soak the hide for about fifteen minutes in the handy dandy lake, a five gallon pail of water, a kids' wading pool or whatever turns your crank.
Place the hide back over the log and methodically scrape off the membrane. If you leave any in place the finished hide will be stiff and won't accept the smoke in the tanning process. The point is to end up with a hide that doesn't have any holes or knicks, so any scraping is best done with a deer leg bone or a blunt iron flesher. The tanner's aim at this point is to remove every...EVERY... bit of flesh and fat, including the paper thin epidermal layer between the carcass and the outer hide.
When you think you've done an excellent job you have to find a way to
rinse the hide in running water overnight. It takes a LOT of rinsing.
Said lake would do the trick, but a creek would be better. If the hide
is small you could put it in a five gallon pail and run a stream of
water from a hose all night long. Don't tell your wife or your mother I
said this, but a couple of cycles in the washing machine works, too if
the hide is small enough.
You're trying to get to the point where your hide feels loose and thin. It will take awhile and at first will seem to get thicker so don't fret. Just keep rinsing. Worse case scenario is that you'll have to do fling it over the log again for more scraping time.
Next morning wring the hide thoroughly. Rig up a wringer on a deck
railing or heavy tree branch and ask a friend for help if its a big
hide. You have to wring in one direction, then the other.
Now you're going to have to stretch the hide as wide and evenly as you possibly can. Usually you can do this on a frame made of poles that you lean up against a couple of trees or your cabin.
The prairie tribes used to stretch the hide between stakes pounded into the ground so that's an option, too. The further you can stretch the hide at this point, the larger the final piece of leather.
If the hair is to be removed, then soaking the skin in a mild acid (urine was used in times past, for example), letting the skin putrefy for several months, or painting a sludge of slaked lime (wood ash and water or ground seashells boiled in water) will loosen the hairs. The hide should then be rinsed before proceeding with the brain tanning.

|
|
 |
 |